Python API in Ashes
Ashes offers an
Application Programming Interface
(API) for custom Python scripts. This is typically used to run your own advanced load models while using Ashes solver, for example wave load models, geotechnical models or controllers. When Ashes and your Python script are running in parallel, Ashes will communicate with the script at every time step. You can for example use output from the Ashes simulation, such as node kinematics of elements characteristics as input to your Python script and send the value of the kinematics-dependent loads back into the simulation.
1 Setting up the API
We have made a very detailed video about how to set up the Python API, available here:
https://www.youtube.com/watch?v=RJ3yznaAkNc
1.1 Install the Simis package
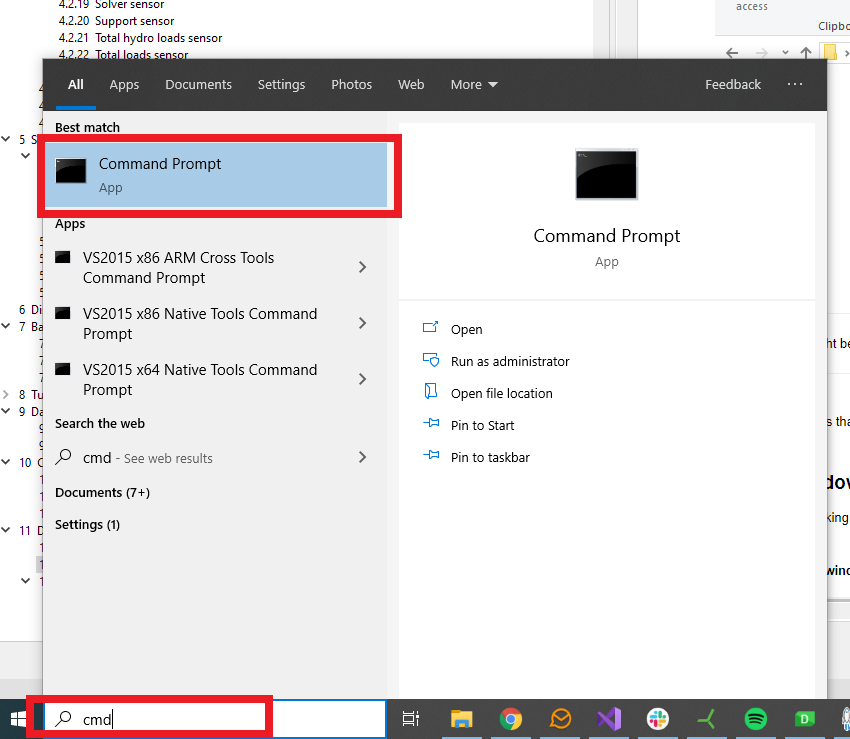
Simply open a command window by typing
cmd in the Windows search bar and launching the
Command Prompt app, as shown in the image below:
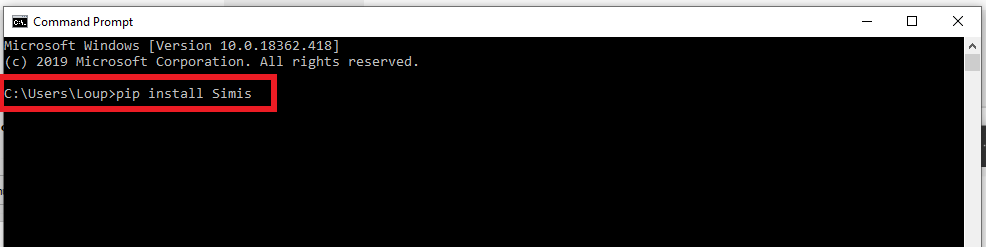
In the command window, type the command pip install Simis, as shown in the image below. Then press enter.
In the command window, type the command pip install Simis, as shown in the image below. Then press enter.
1.2 Enable external script
1.2.1 For controllers
You can use a Python script as a controller. To do so follow these steps:
- Select the Wind turbine in the Parts pane.
-
Click on the Python icon on the top of the
Parameters
pane.

- Check Enable Script
- Decide whether the Script is to be run automatically or manually
- Automatically: Ashes uses the Python executable defined in Preferences to call the selected Python script. For this to work, all created Python files have to be in the same file-hierarchy and they will get saved into the ashes file. This method should be used for easy shipping and usage of tested Python scripts.
- Manually: Ashes will wait for a Python script to connect to it once the simulation is started. This can be used for the debugging of the Python script or if the Python script should not be started by Ashes. The Python script has to be run from the console or an IDE of choice.
You can use Python scripts in four cases:
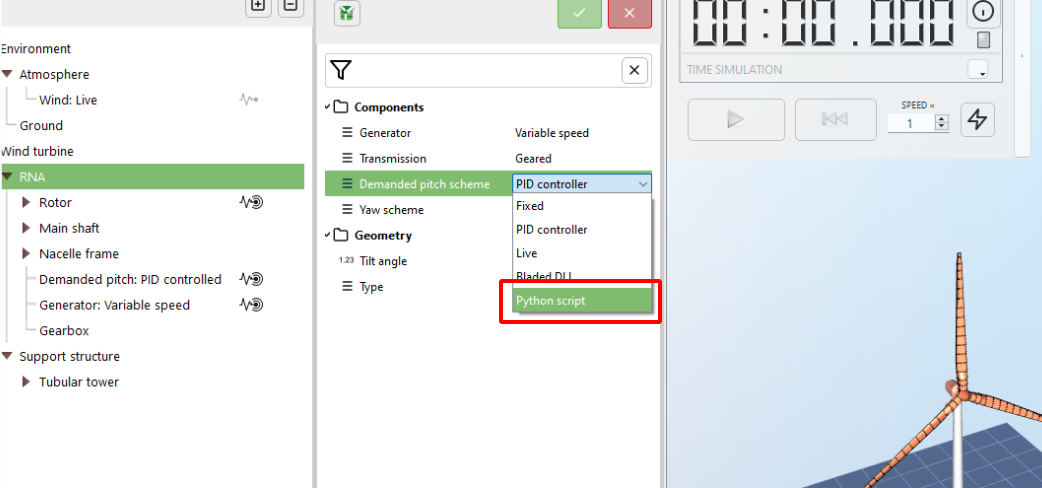
- as a controller for the Demanded pitch
- as a controller for the Pitch actuators
- as a controller for the Generator
- as a controller for the Yaw actuator
For each of these cases, you wil have to select
Python script as the option for the parameter. The examle below shows how to select it for the
Demanded pitch parameter:
1.2.2 For support sections
Python scripts can also be used to compute loads on the support section accounting for the motion of the structure itself. To do so
- Select the relevant support section in the Parts pane (for example, Tubular tower, Floater, Monopile, etc)
- Click on the Python icon on the top of the Parameters pane (see picture in section 1.2.1 of this document)
- Click Enable script
- Decide whether the script will be running automatically of manually (see point 4 in section 1.2.1 of this document)
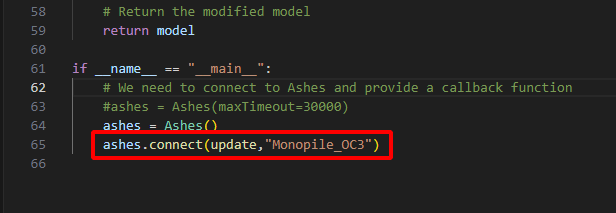
Note that you can use a Python script for any support section that you have in your model. For example, if you have a Tubular tower on a Monopile, you could have one python script for each. you will then need to make sure that the name of the support structure is passed as a parameter to the
ashes.connect() function at the end of the scipt.
In the example below, the script will be applied to the part named
Monopile_OC3
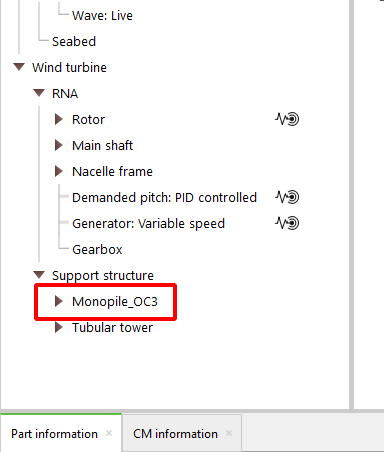
The name of a support section can be found in the parts tree, as shown in the image below:
The name of a part can be changed with the
Name
keyword in the
Support section files.
Note: Ashes will need the latest version of the Simis package for the API to work correctly. If you run into issues when running your Python script, always make sure you have the lates version by typing
pip install Simis --upgrade in a command window
2 Interface variables
The values provided by the Ashes interface are the following:
| Parameter | Unit | Name in Data structure |
| Current simulation time | s | time |
| Average Wind including tower shadow | m/s | wind |
For each rotor:
|
|
"rna->GetLocalName()" (ex: RNA or RNA1)
|
|
|
|
| For FEM parts: | support | |
|
|
|
|
|
|
The collumn "Name in Data structure" describes how the values can be accessed in the Python environment. Names under quotation-marks are dynamically set and are the names defined in
Support section files with an additional Prefix describing the Part type (RNA, Blade, Node or Element).
Ashes accepts values from Python in the following structure. Variables that the script sets (writes back to Ashes) are prefixed with
set_ to distinguish them from the read-only inputs above:
| Parameter | Unit | Name in Data structure |
For each node:
|
|
"Node->GetLocalName()" (ex: Node1)
|
For each Rna:
|
|
"Rna->GetLocalName()" (ex: RNA or RNA1)
|
|
|
|
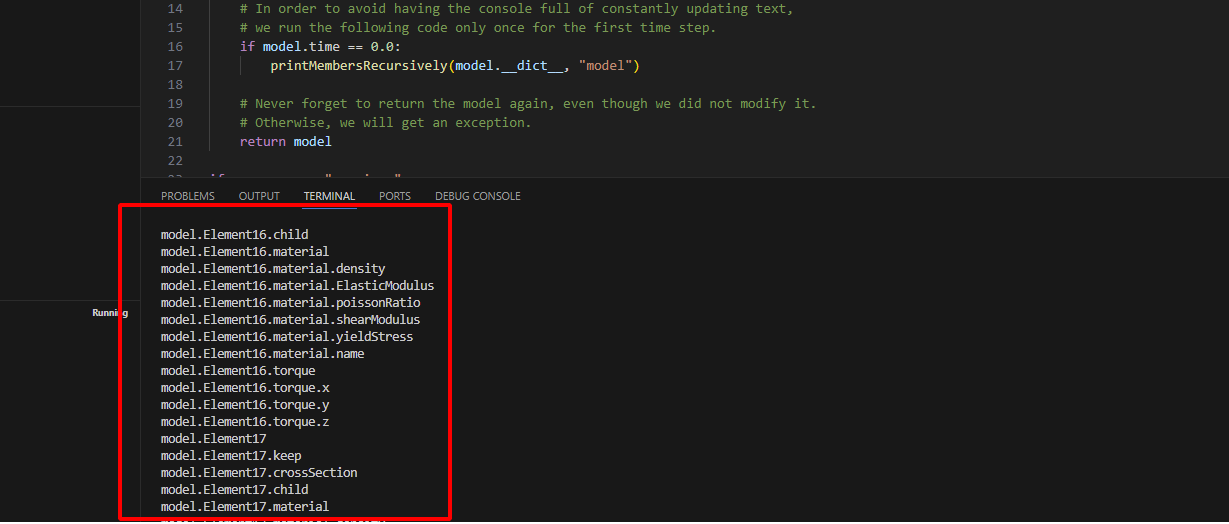
2.1 The displayModel.py script
One of the scripts that is shipped with Ashes is
displayModel.py, which you can find in the
Python API examples folder. This script is not intended to be used during a time simulation. It is a hack meant to show you all the parameters that are available for a given Ashes part in your script.
For example, you can use it to find all the available parameters of a Tubular tower: just run the
displayModel.py script in Manual mode following the steps as shown in section 1.2.2 above. Once you run the script in your IDE, you will see in the terminal a list of all the parameters that can be used in your script, as shown in the image below.
Similarly, you can run it as a controller. It will then display all the parameters available to use in the controller script. Note that this includes parameters belonging to the support sections as well (if applicable). This means that parameters such as loads or displacements within the support section can be used to design the controller.
3 Tips and Tricks
- You can find examples of scripts that work wish Ashes in C:\Users\UserName\Documents\Ashes X.xx\Python examples. These scripts can be used as templates to write your own scripts.
- The API works for Python 3 versions.
- We use the free IDE Visual Studio Code, that can be downloaded from the following link: https://code.visualstudio.com/. This has worked great for us, when writing or debugging code, but the API will work with any IDE.
- You can run your script in debug mode if you need insight into issues that your code might have
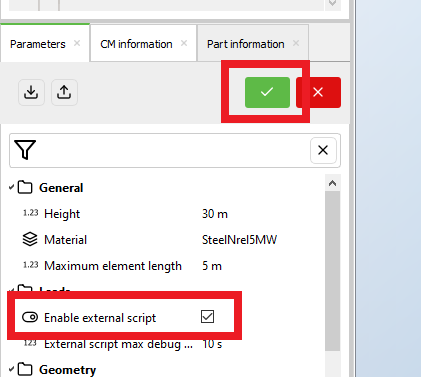
-
If your script crashes or is stopped for too long, you will need to restart the model in Ashes to be able to run the script again. The simplest way to do that is to modify a parameter and set it back to its original value, for example
- Uncheck the Enable external script box
- Check it back
- Apply the changes (although in this case nothing will be changed) by clicking the green tick mark, as shown in the figure below