Preferences
You can set some of your preferred options by going to
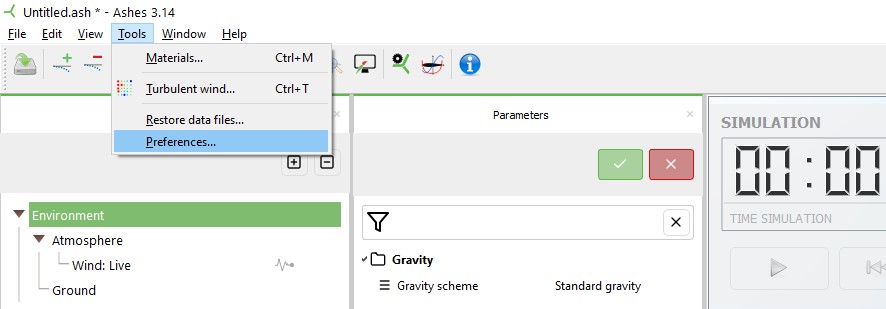
Tools->Preferences, as shown in the image below.
These preferences will be saved and kept for your later use of Ashes. When you open the
Preferences window, you will have access to several tabs, explained below.
1 General
This tab lets you set general application options.
1.1 Color theme
You can choose between three options for the color theme of the Ashes interface:
- Use system theme: Ashes will follow the color theme defined by your operating system.
- Use light theme: Ashes will use a light color theme regardless of the system setting.
- Use dark theme: Ashes will use a dark color theme regardless of the system setting.
Note: you might have to restart Ashes for the theme change to be fully applied.
2 Formatting
This tab enables you to set how numbers are displayed in Ashes. There are three sections in this tab.
2.1 Number format
This enables which format to use for all numbers displayed, in particular what
thousand separator will be used.
Note: this does not affect the thousand separator when exporting results
2.2 Sensor windows
Here you can choose how output will look like in the
Sensor pane. The number of significant digits is always set by you, but you can choose between two formats
- Automatic: no exponent is shown, unless the number of significant digits is lower than the number of digits of the integer part. For example, consider the value 123.456: If the number of significant digits is set to 4, the number will be shown as 123.4. If the number of significant is 2, the number will be shown as 1.2e+02.
- Scientific: the scientific notation is used, with the number of significant digits set by you. For example, if 4 significant digits are set, the value 123.456 will be displayed as 1.234e+02
2.3 Information window
Here you can define the formatting of the information window. You have two options
- Automatic: the number of significant digits is automatically set by Ashes and the units are shown in the most convenient way. For example, a mass of 25 000 kg will be shown as 25 t.
- Scientific: the scientific notation is used. A set of predefined units (m, kg, N, etc) is used
3 Export settings
This tab enables you to set the format of the files written by Ashes. This applies to files exported from time simulation and files written by the batch manager
4 Fatigue
This tab sets the parameters used for the
Fatigue analysis. The parameters in this tab are
- Stress points: this will define the number of points around the circular cross section where the stresses will be computed. Note that the points will be equally distributed along the circumference of the cross section, so if you select 4 points you will have one point at 0 degrees (i.e. North facing), one at 90 degrees, one at 180 and one at 360.
- Stress concentration factor (SCF): the stress time series will be multiplied by this value. Note that for joints (defined in the Support section files), the SCFs are automatically computed by Ashes
- Stress ranges filter: when performing the Rainflow counting, any stress range below this value will be disregarded
- Number of bins: the number of bins for stress ranges that will be used to count load cycles
- S-N curve: the S-N (or Wholer) curve that will be used to compute the damage from the stress cycles
Note: all these parameters can also be set in the input file for the support structure (which will then override the parameters set in this tab). This is necessary when different values for different fatigue sensors are required (for example, if different SCFs at different locations of a tubular tower are needed)
5 Batch computing
This tab applies to the batches created in the
Batch manager. Every new batch will be created with these options, but for each individual batch it is possible to override the options by going to the
Batch preferences. Seven parameters can be set in this tab:
-
Save results to
This enables you to define the path of the folder where you want the results from batch runs to be saved -
Save model for each load case?
If this option is enabled, one Ashes file will be saved for each load case simulated in the batch. This can be useful for double-checking that the results produced for a given load case correspond to a certain model. However, if models are large, this will use storage space on your computer. -
Save export batch file?
If this option is enabled, the .csv file corresponding to the batch will be saved together with the results. This is useful to check what load cases were run in a batch, and to reproduce a given batch -
Keep turbulent wind files?
If this option is enabled, the .wnd files that contain the turbulent wind field will be saved to the results folder. This is useful reproduce results with the same turbulent wind. However, turbulent wind files can be very large and this will use storage on your computer. Note that the .inp and .sum files generated by TurbSim are always saved together with the results. -
Store sensor results in binary format?
If this option is enabled, 2 results files will be produced for each sensor: one will be an ASCII file, the other one will be a binary file. Note that this option will be overriden if there is a fatigue sensor: binary files for a fatigue sensor will always be produced (regardless of the setting) as these are needed to produce the fatigue report. -
Store static part information?
If this option is enabled, the data otherwise only shown in the GUI Part information and CM information panes (for example tower mass, rotor diameter, centre of mass and rotational inertia) is written for every part to the files PartInformation.txt and MassInformation.csv in each job's results folder. This makes that information available after a batch run, for example to use it in an optimisation loop. See Output files for a description of these files. -
Store FEM mesh information?
If this option is enabled, the FEM mesh information of each part (nodes, beam elements with their cross sections, supports, loads and joints) is written to the file FemInformation.json in each job's results folder. See Output files for a description of this file.
6 Python
This tab enables you to set parameters relevant for simulations that use a Python script
-
Python executable
This parameter specifies the path of the Python executable that should be used -
Maximum waiting time
This parameter specifies how long Ashes will wait for the Python script to send results before displaying an error. There are two use cases that can require different waiting times:
- when setting the Python script option to Manual in the External controller window (for example to debug your Python script), you want the waiting time to be relatively high, so that while the simulation is running you can spend time on the Python code without Ashes returning an error message. This is also required if you want to debug the controller.
- when setting the Python script option to Automatic in the External controller window, you want the waiting time to be relatively low, so that if the Python script crashes while the simulation is running, Ashes will not wait too long for results to be sent back before displaying an error message.
7 Sensors
This tab lets you control which fields are shown for each sensor type in the
Sensor pane, and which unit each field is displayed in. This is useful if you only care about a subset of the available outputs and want to keep the Sensor pane uncluttered, or if you want a field displayed in a different unit than the default.
The tab shows a tree with one entry per sensor type. Expanding a sensor reveals its individual fields, with a checkbox to enable/disable the field and a drop-down to pick the unit it should be displayed in.
The following buttons are available:
- Reset to defaults: restores the default selection of fields and units for all sensors.
- Check all / Uncheck all: enables or disables every field for every sensor at once.
- Import... / Export...: load or save the current sensor preferences to a file, which is useful to share a configuration between machines or users.
Note: changes in this tab only affect sensors that are added after clicking
OK or
Apply. Sensors that already exist in the model keep their current fields and units.
8 Misc.
This tab gathers a few additional options that do not belong to any of the other categories.
8.1 Default model parameters
- Wind and wave direction: the default direction (in degrees) that will be applied to the wind and waves in newly created models.