Note: the cli works by taking the base model and modifying its parameters according to the value of each parameter specified in the csv file. If a value in the base model is the same as the csv file, it will not be modified.
This poses the following issue: imagine you create and save your base model with an textfile based tubular tower, named Tower.txt, and you add the
tubular tower input file
parameter to the csv file. When you run the cli, it will take the base model, see that the file that was used to create the base model is the same as the one in the csv file and therefore not update the model. If you then modify the text file
without changing its name, the cli, will still not update the tubular tower since the
input file
parameter is the same.
If you want the tower to change when the cli is run, you need to change the name of the text file (and update the csv file accordingly).
Using the command-line interface
The Ashes command-line interface (ashes-cli) allows you to run batch simulations from the
command-line
or from a
Python script. This section will explain how to run a
simple batch
and then an example where
ashes-cli
is used in an
optimization loop
is shown. Further, options for adding/removing blades is explained.
1 Command-line options
The following table lists all available options for the ashes-cli.
| Option | Argument | Description |
|---|---|---|
-?, -h, --help |
Displays help on command-line options. | |
--help-all |
Displays help, including generic Qt options. | |
-r, --runbatch |
If set, the specified batch will be run. The batch CSV file must be specified with the --batchcsvfile option, and the project file with the --projectfile option. |
|
--numcores |
<numcores> |
Sets the maximum number of CPU cores to use when running a batch. The actual number used may be lower depending on your system. |
-p, --projectfile |
<pathtoprojectfile.ash> |
The path to the Ashes project file (.ash) containing the model to be used in the batch. |
-b, --batchcsvfile |
<pathtocsvfile.csv> |
The path to the batch CSV file to run. |
-o, --resultsfolder |
<pathtoresultsfolder> |
Sets the root results folder. Used by --runbatch as the output folder for batch results, and by --report as the working directory. |
--resultsformat |
<text,binary,sqlite> |
Specifies in which format(s) to output the sensor results when running a batch (one or more of text, binary, sqlite). The text format is enabled by default. |
--exportinfo |
<partinfo,feminfo,sensors> |
Specifies which static model information to export per job (one or more of partinfo, feminfo, sensors). This is independent of --resultsformat: it exports model data, not a format of the sensor results. partinfo writes the static part information (the Part information and CM information panes, e.g. tower mass and rotor diameter) to PartInformation.txt and MassInformation.csv. feminfo writes the FEM mesh information (nodes, elements with their cross sections, supports, loads and joints) to FemInformation.json. sensors writes the catalogue of every sensor that could be added to the model (each as a ready-to-use batch sensor string) to SensorInformation.json. See Output files. |
--report |
<reporttype> |
Generates a report. Valid types: model, batch, energy, compare. The results folder must be set with --resultsfolder. |
--convert |
<format> |
Converts the given project to another format. Currently the only valid value is: yaml. |
--addblade |
Adds a blade to the database. The arguments --bladeshapefile, --bladestructurefile and --bladename must be specified. |
|
--addairfoil |
Adds an airfoil to the airfoil database. | |
--removeairfoil |
Removes an airfoil from the airfoil database. The option --airfoilname must be specified. |
|
--removeblade |
Removes a blade from the database. The argument --bladename must be specified. |
|
--bladeshapefile |
<bladeshapefilepath.txt> |
Specifies the blade shape file. Used with --addblade. |
--bladestructurefile |
<bladestructurefilepath.txt> |
Specifies the blade structure file. Used with --addblade. |
--bladename |
<bladename> |
Specifies the name of the blade. Used with --addblade. |
--airfoilname |
<airfoilname> |
Specifies the name of the airfoil. Used with --addairfoil. |
--polarfile |
<polarfilepath.txt> |
Specifies the polar file for the airfoil. Used with --addairfoil. |
--makedefaultmodel |
<modeltype> |
If set, a default model will be created and saved to file. The value must be one of the names of the default models as found in the Ashes desktop application. Examples: RNA only, Onshore. |
--benchmark |
<numthreads | * | optimum> |
If set, a benchmark will be run to help determine the optimal number of threads. The value must be either: (1) a number specifying the number of threads to use, (2) *, which will use all available threads, or (3) optimum, which will run the benchmark with all possible values for number of threads. |
--restoredatabase |
Restores the component database (ashescl.db) located in %appdata% to factory default. Make sure you have a backup of the current database if it contains custom components (blades, RNAs, etc.). |
|
--verbose |
Enables verbose debug output, useful for troubleshooting. |
2 Running a batch
To run a batch, two files are needed: (1) An
Ashes project file
(.ash) containing your model, and (2) a
batch CSV file
defining your batch. The project file can be created by saving your model in Ashes to file, and the CSV file can be exported from the batch manager, see
CSV file.
The command to run the batch is
1
ashes-cli -runbatch -projectfile *pathtoprojectfile* -batchcsvfile *pathtocsvfile*
The ashes-cli is located in the Program Files folder (unless you installed it somewhere else). To run ashes-cli, you have to go to the installation folder first. Here is an example:
1
2
cd C:\Program Files\Ashes 3.20
ashes-cli -runbatch -projectfile "C:\Users\Per Ivar\Documents\Ashes 3.20\Onshore.ash" -batchcsvfile "C:\Users\Per Ivar\Documents\Ashes 3.20\Batch.csv"
The
results
from this batch will be saved in the folder
C:\Users\Per Ivar\Documents\Ashes 3.20\Batch runs\Batch
(replace with your own username).
3 Running ashes-cli from a Python script
The ashes-cli can easily be run from a Python script, using the subprocess module. Here is a Python script example for running a batch:
1
2
3
4
5
6
7
8
9
import subprocess

# Change these paths to use your own username
ashesExePath = "C:/Program Files/Ashes 3.20/ashes-cli.exe"
projectFilePath = "C:/Users/Per Ivar/Documents/Ashes 3.20/onshore.ash"
csvFilePath = "C:/Users/Per Ivar/Documents/Ashes 3.20/Batch.csv"

result = subprocess.run([ashesExePath, "-runbatch", "-projectfile", projectFilePath, "-batchcsvfile", csvFilePath])
print ("Return code: {}".format(result.returncode))
4 Examples
This section explains how to add/modify any parameter from the Ashes model and run a simulation from the cli with the modified parameter (note that this is a suggestion on how to proceed, but other options are possible). The following subsections are examples of cli scripts that can be used.
In order to modify a parameter of an Ashes model and run a simulation with the cli
-
Save the default model (also called 'base model') to file (you will then have a
.ash file). You can either use a model you have created yourself or open a default template.
This is the Ashes project file that will have to be called from the cli.
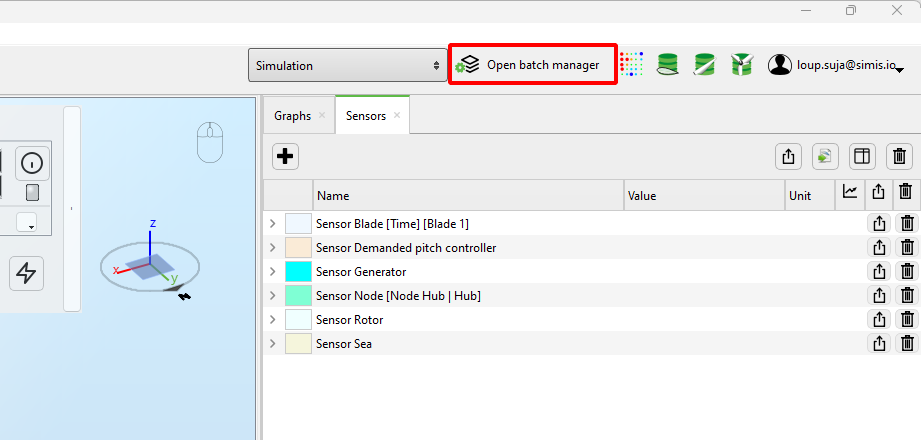
-
Open the batch manager
-
In the batch manager, create a new default batch
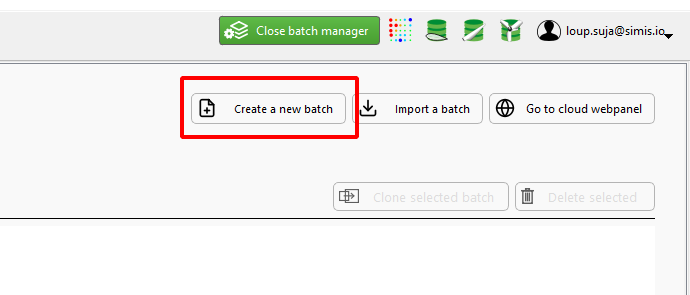
You will have to enter a name for your batch.
If you have an existing batch that has been save to csv, you can also use that by selecting Import a batch
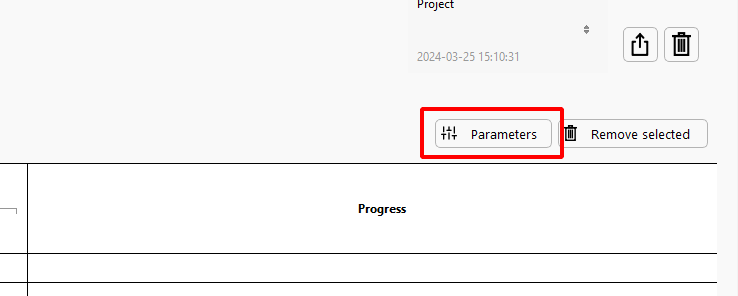
-
In the newly created batch, click
Parameters to open the display parameter window
-
Locate and add the parameter to your batch. In the example below, the parameter
Mean sea level is added
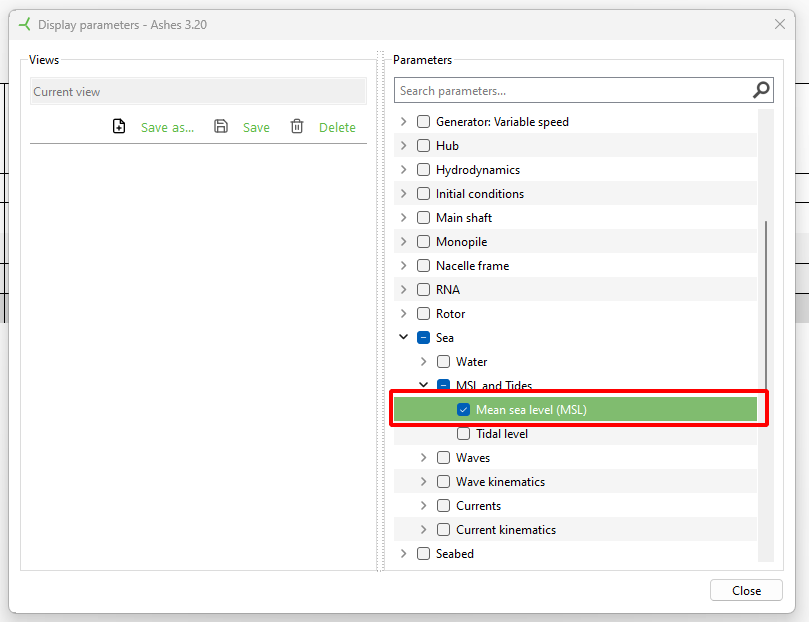
When you close the Display parameter window, the new parameter will have been added to the batch.
Note that the value of the parameter in the batch once it is added will correspond to the value of the parameter of the model that was open when creating the batch. This can be changed once the parameter is added to the batch
-
Export the batch to a CSV file. This is the batch CSV file that will have to be called from the cli.

Note that this file also defines what kind of simulation will be run (for example, a time simulation, an eigenfrequency analysis or a Cp curve) and the duration of the time simulation, if applicable.
-
That file can now be modified from the script that will run the simulation. The following snippet is an example of how to modify the csv file:
123456789import pandas as pd csvFilePath = 'Batch.csv' newCsvFilePath = 'NewBatch.csv' NewMSL = 5 df = pd.read_csv(csvFilePath, sep=';', dtype="string", header=None) df.iat[4,8] = str(NewMSL) df.to_csv(newCsvFilePath, sep=';', index=None, header=None)
-
Once the CSV file has been modified by the script, the simulation can be run in the script as well, as illustrated in the snippet below:
123456789101112131415Here goes thimport pandas as pd import subprocess ashesExePath = 'C:/Program Files/Ashes 3.21/ashes-cli.exe' projectFilePath = 'MyModel.ash' csvFilePath = 'Batch.csv' newCsvFilePath = 'NewBatch.csv' NewMSL = 5 df = pd.read_csv(csvFilePath, sep=';', dtype="string", header=None) df.iat[4,8] = str(NewMSL) df.to_csv(newCsvFilePath, sep=';', index=None, header=None) subprocess.run([ashesExePath, "-runbatch", "-projectfile", projectFilePath, "-batchcsvfile", newCsvFilePath])e code
4.1 Optimization loop in a Python script
In this example we will modify the
tower thickness
in the input CSV file, and gradually increase it until the
maximum normal stress
is lower than the yield stress of steel.
This example uses two files:
Onshore.ash,
the project file; and
Batch.csv, the batch file. Both of these files are found in the Examples/Ashes-cli examples folder, which you can open by going to
Help | Open examples folder. You also find the Python script itself there, called
ashesCliOptimizationLoopExample.py.
This example uses the
pandas module. You might have to install it by running
pip install pandas
in a command line.
4.2 Power curve generation for random turbulent wind speeds
This example can be found in
\Documents\Ashes X.yy\Ashes-cli examples\ashesCliWindSpeedCurve.p y.
It can be run with the default onshore model which has to be called
onshore.ash
and located in the Ashes X.yy folder.
It uses the csv file
WindSpeed_curve.csv, located in the same folder.
The script contains several absolute paths. Make sure the pats are changed before running the script.
See the comments in the script for a detailed explanation of how the script works.
4.3 Adding and removing blades
4.3.1 Adding a blade
Blades can be added to the database using the
-addblade argument. Additionally, you must specify the following arguments:
| Argument | Description |
| bladename | The name of the blade that is to be added to the database. It is recommended to not use whitespaces in the name. |
| bladeshapefile | The path to the Blade shape file. |
| bladestructurefile | The path to the Blade structure file. |
Here is an example:
1
ashes-cli -addblade -bladeshapefile="C:\Users\User\Documents\Ashes 3.21\NREL 5-MW blade shape.txt" -bladestructurefile="C:\Users\User\Documents\Ashes 3.21\NREL 5-MW blade structure.txt" -bladename=myblade
If the command is successful, the blade has been added to the Ashes database. If you want to verify that the blade is correct, you can start Ashes and open the
Blade database.
4.3.2 Removing a blade
Removing a blade from the database is done with the
-removeblade argument. In addition, you must specify the blade name with the
-bladename argument.
1
ashes-cli -removeblade -bladename=myblade4.4 Run an eigenfrequency analysis
Currently, running an eigenfrequency analysis in the cli has to be done by adding the parameter
Solve eigenmodes (In Analysis->Misc) and setting it to
True.
Note: this will solve the eigenmodes in addition to running the time simulation. IF the results from the time simulations are not relevant, you can set the simulation time to an arbitrarily small number and/or remove the sensors from the model