Cloud computing
Ashes provides the possibility to run batches on commercial clouds such as Microsoft Azure or IBM on a pay-per-hour basis where the user is charged each month for the simulation they have run. This enables running batches with very large number of load cases (typically 10 or 20 thousand load cases) which is not realistic on local computers. This option is not available on Ashes by default, so if you are interested in using the cloud please contact us at support@simis.io.
1 Setting up a cloud batch
To define the batch, follow the steps shown in the
Batch window section. Once the batch is defined, click on the button highlighted in the image below and select whether you want the batch to be run on your local computer or on the cloud. By default, all batches are set to be run locally
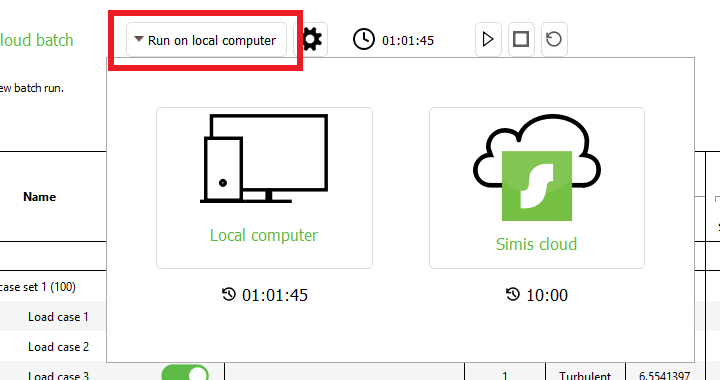
When your batch is set as a cloud batch, it will appear with a cloud icon
 in the
Batch manager.
in the
Batch manager.
in the
Batch manager.2 Start cloud batch/ pricing
Once the batch has been set as a cloud batch, click the play button to start it. This will open the pop-up window shown below:
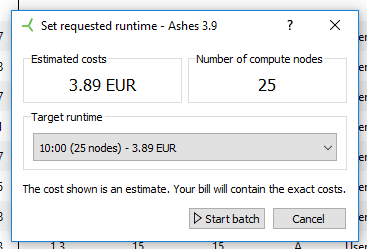
This window gives you the possibility to select the number of nodes that will be used for the computation. Each node contains four virtual machines, which means that 4 simulations can be run in parallel in each node. The current example is a batch of 100 load cases, therefore the fastest way to compute it is to run it on 25 nodes. The dropdown menu gives the option to reduce the number of nodes. This increases the simulation time but decreases the price.
Note that the cost and the time shown in this window are only an estimate. The exact cost is displayed in the bill sent to you at the end of each month
Once the batch is started, Ashes will be installed in the virtual machines. This takes between 5 and 10 minutes, and during that time the status of the batch will be
Queuing.
While the batch is running, you can check the progress in the progress area of the Batch window or on your profile page online. For that, log on to your profile by going to www.simis.io and clicking the user icon . Once you've entered your credentials, go to the
Cloud computing section. Here you find your cloud batches and spendings for the month.
. Once you've entered your credentials, go to the
Cloud computing section. Here you find your cloud batches and spendings for the month.
While the batch is running, you can check the progress in the progress area of the Batch window or on your profile page online. For that, log on to your profile by going to www.simis.io and clicking the user icon
. Once you've entered your credentials, go to the
Cloud computing section. Here you find your cloud batches and spendings for the month.
The spending shown in your user profile should correspond to your use of cloud computing, but the actual cost is what is displayed in the bill sent to you at the end of each month. If you are unsure of what your spendings of the cloud are, please get in touch with us at support@simis.io
3 Cloud batch results
Once the batches are complete, the results will be stored on the cloud. To access and download your results you will need to use the free software Microsoft Azure Storage Explorer (
https://azure.microsoft.com/en-us/features/storage-explorer/). You will need credentials to log in to your account and access your results. To set up your account, p
lease get in touch with us
at support@simis.io
3.1 Set up Microsoft Azure Storage Explorer account
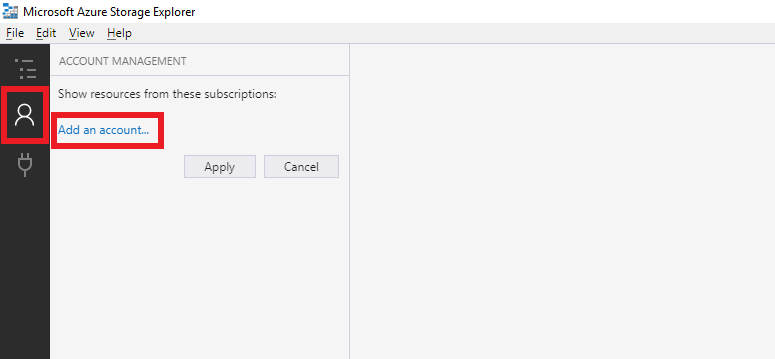
Once you have downloaded Microsoft Azure Storage Explorer click on the
account management icon, and then on
Add an account, as shown in the image below.
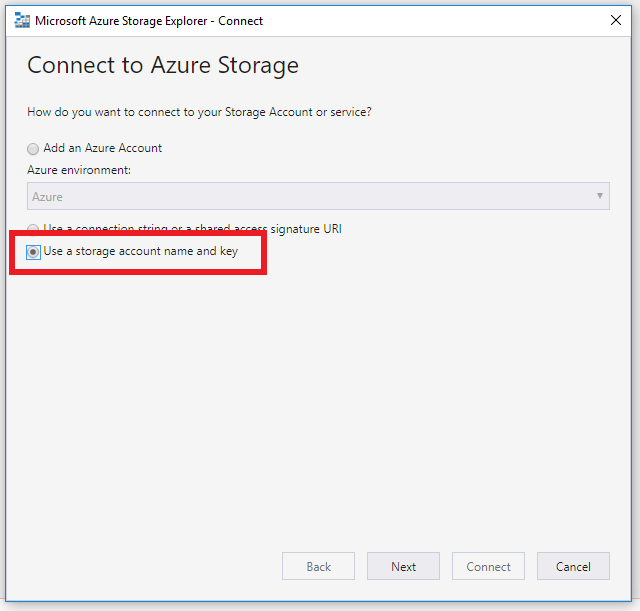
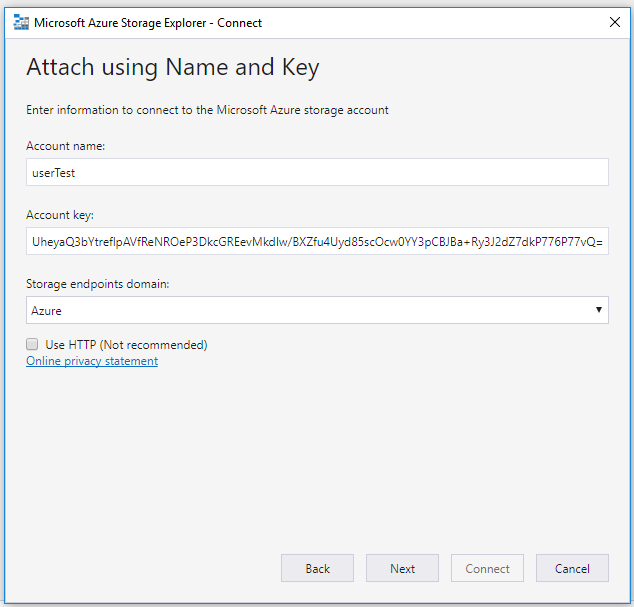
In the window that pops up, select
Use storage account name and key as shown in the image below and press
Next
Then, enter the account name and key you were provided, and press
Next
The next window shows a summary of the information you have entered. Press
Connect and you will be connected to your account.
3.2 Access your results
In order to access your data, you will need the ID of the cloud batch you are running. You can find this by going to you account (go to
www.simis.io
and click the
icon) and going to the
Cloud computing tab. The batcn ID appears in the area marked in red in the image below.
icon) and going to the
Cloud computing tab. The batcn ID appears in the area marked in red in the image below.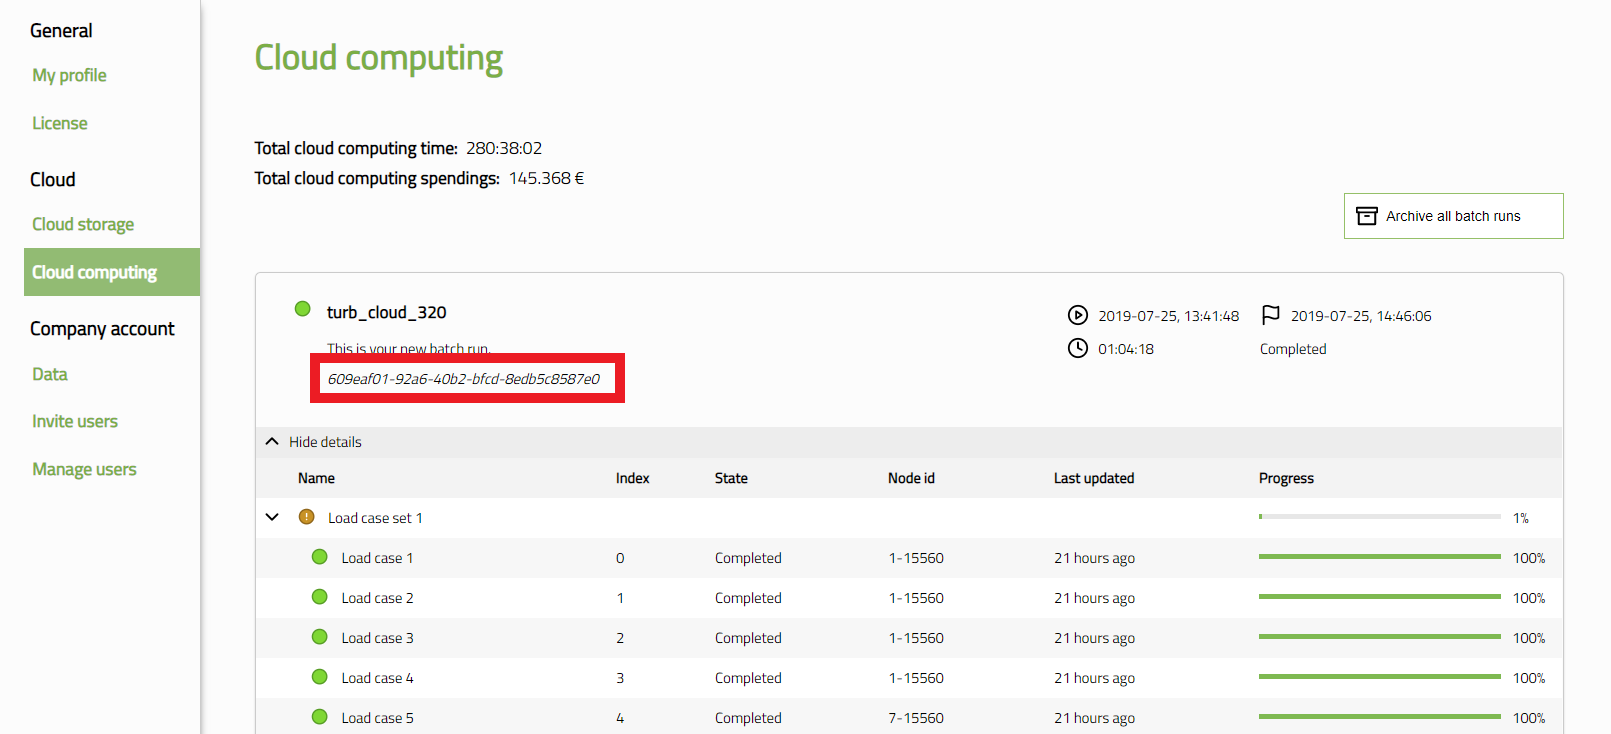
In the
Microsoft Azure Storage Explorer, you can now browse to
Local & Attached/Storage Accounts/Username (key)/Blob Containers/Batch ID to access your data, as shown in the picture below
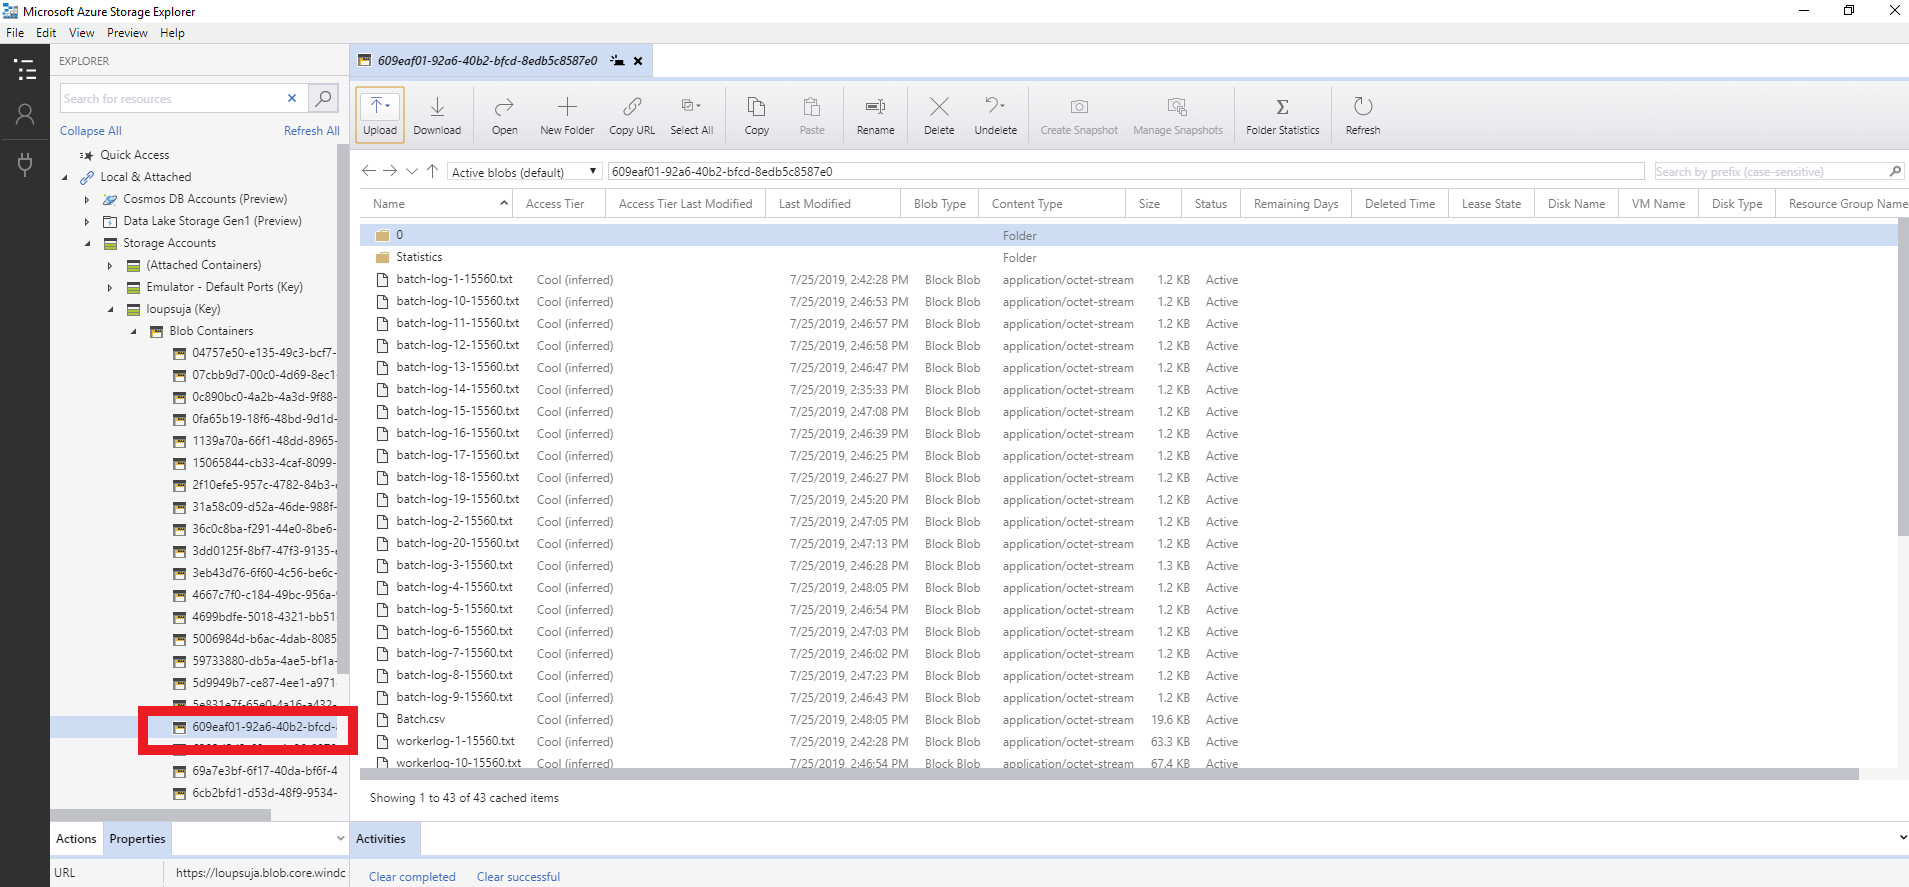
Go the the relevant folder and use the
Download button to download the data to your computer
4 Tips and tricks for cloud computing
- Sometimes the progress bar in Ashes or in your account webpage do not match the actual progress of the simulations. Even if a simulation appears as not progressing, do check the results in the Microsoft Azure Storage Explorer.
- If one simulation fails, all simulations that were run on the same node will fail as well. Therefore, it is recommended to slightly increase the number of simulations to cover up for that.
- For large batches, very large amounts of data can be generated and it will take a long time to download all the data. In order to decrease the amount of data, you can 1) only select the sensors that are relevant to your study and 2) download only the statistical data from the simulations that you ran (make sure to adjust the Statistics start time in the Advanced section of the Analysis tab to avoid transients if relevant)